You’ve been to some incredible places. But if someone asks “where have you traveled?” - what do you show them? A camera roll with 5,000 photos? A list of countries in your Notes app?
I always felt like there should be a better way to show your travel story at a glance. That’s why I built the travel map profile in Mapstra - a single page that shows everywhere you’ve been on a world map, with your stats, your flag collection, and your trips. It’s designed to look great as a screenshot you can post on social media or send to friends.
In this post, I’ll walk you through two ways to create your own travel map profile. One is detailed and trip-focused. The other is fast and built around the big picture. Both end up with a profile page you’ll actually want to share.
What Is a Travel Map Profile?
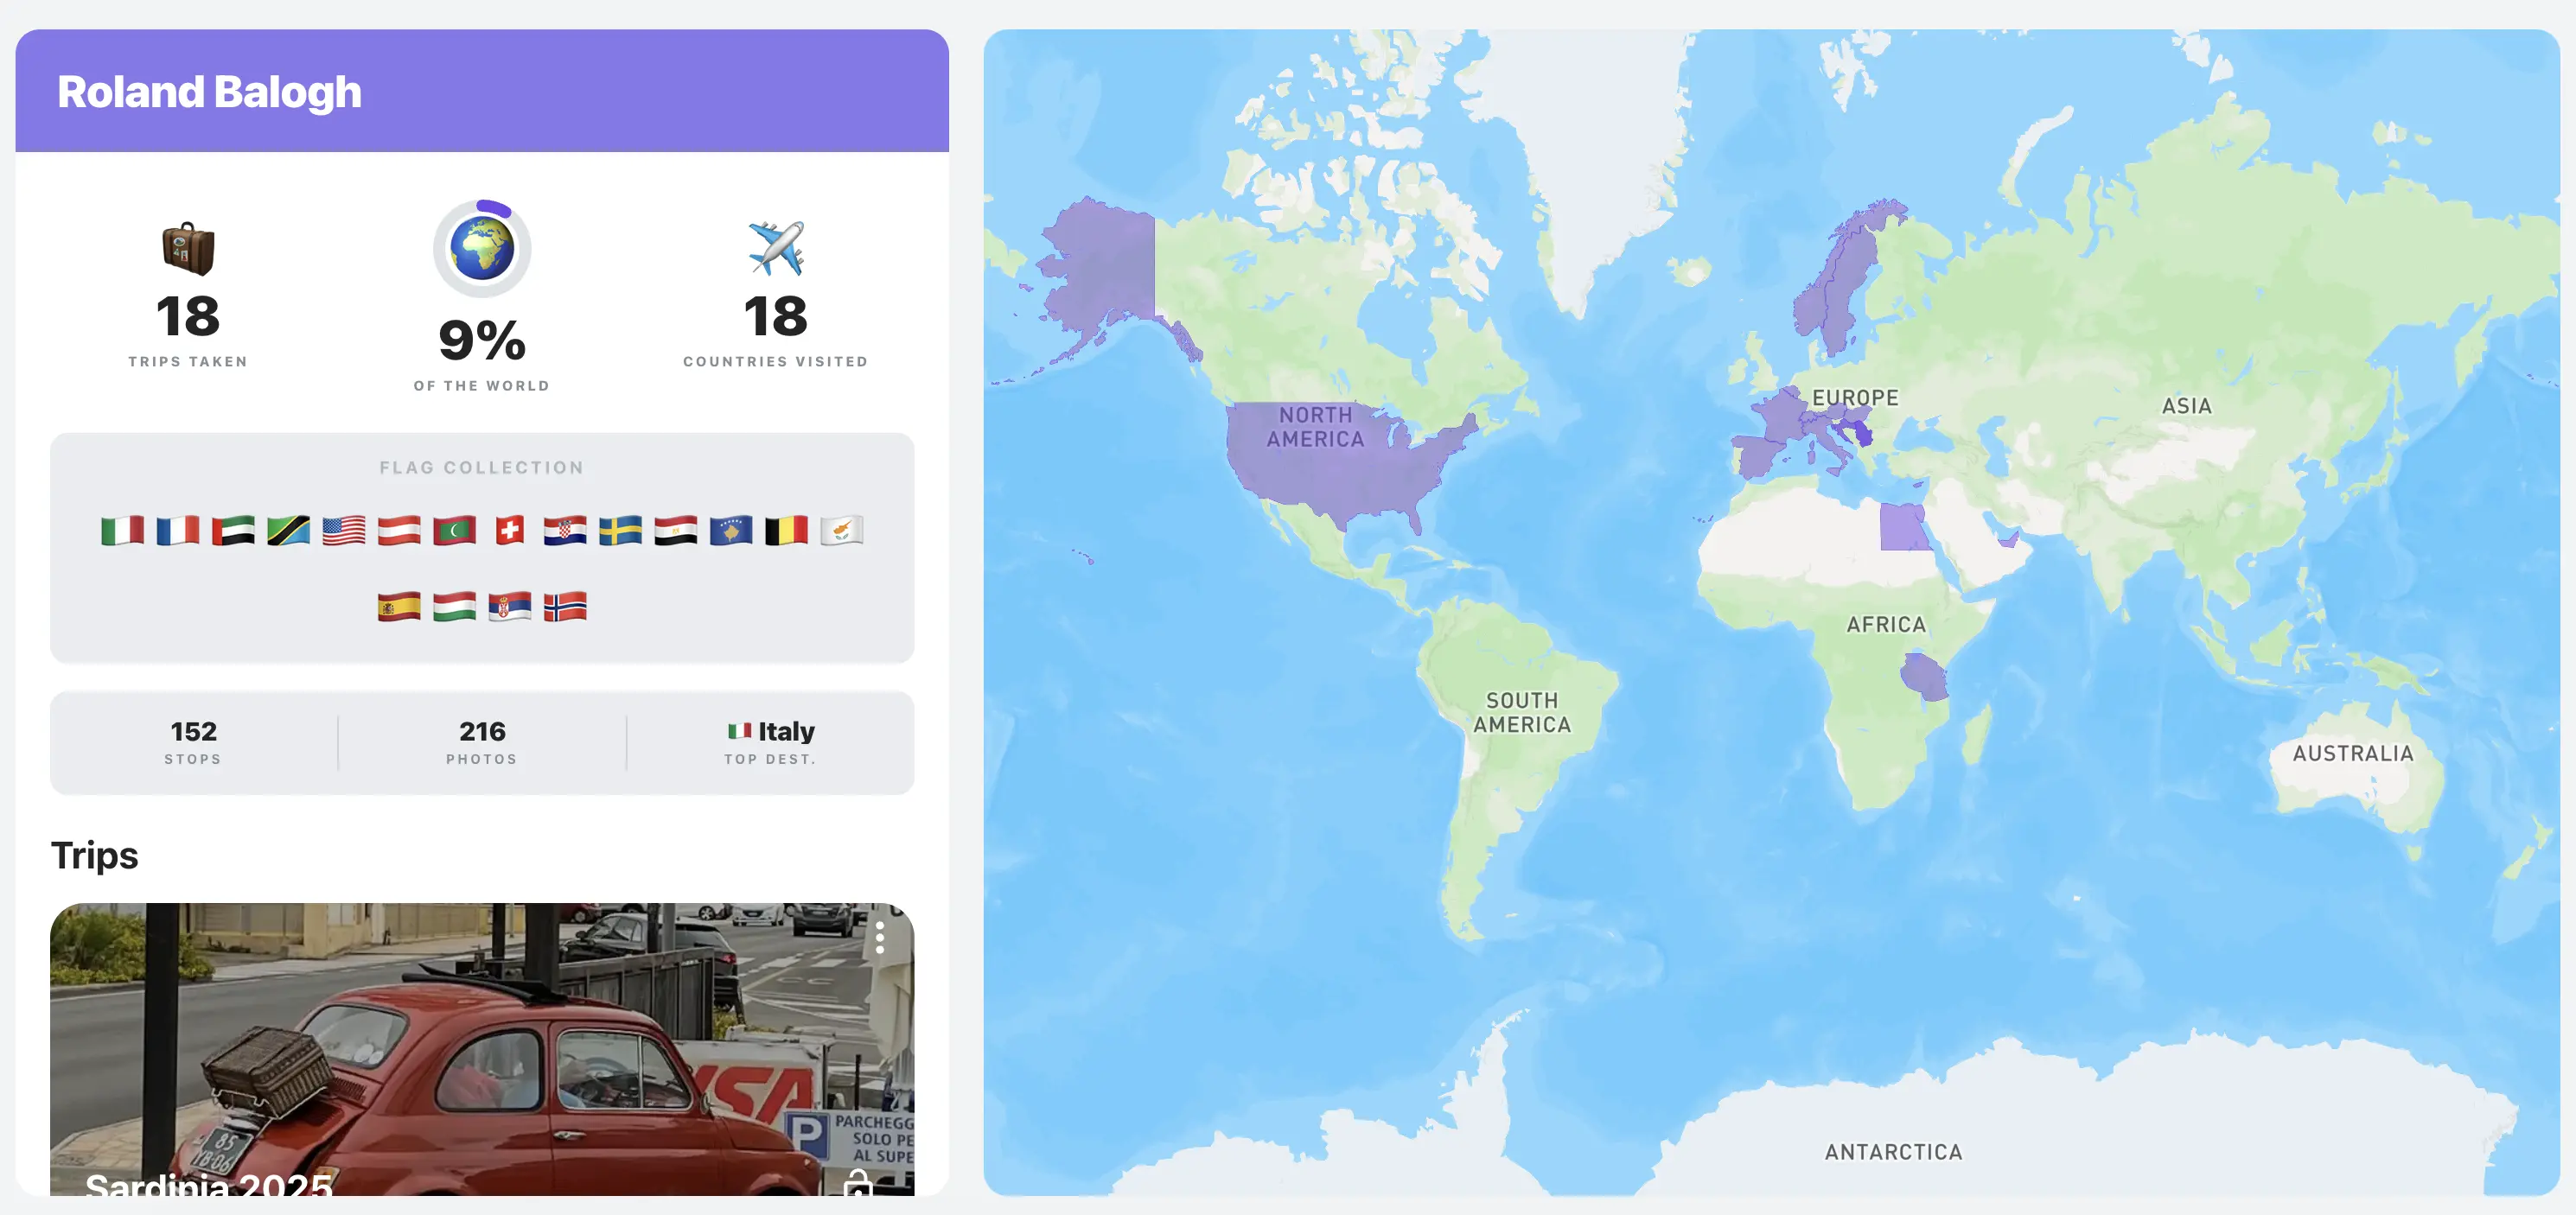
Your Mapstra profile is a page that brings together everything from your travel maps into one view. Here’s what it includes:
- A world map highlighting every country and location you’ve visited
- Travel stats - trips taken, percentage of the world explored, and countries visited
- A flag collection - every country’s flag, earned by creating a map there
- Top destination - the country you’ve visited the most
- Total stops and photos across all your maps
- A list of your trips with cover photos
The profile page updates automatically as you create new maps and add photos. Every trip you build feeds into your overall travel story.
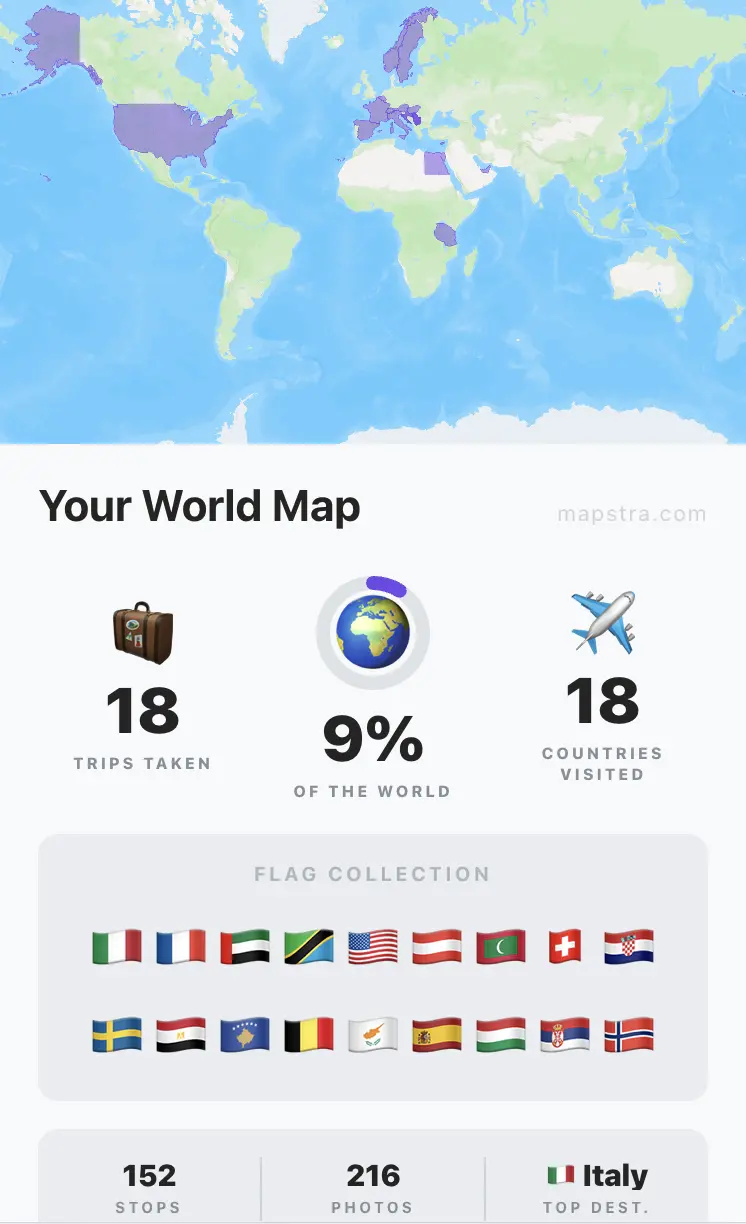
The best part? The profile looks great as a screenshot - whether you’re posting it on Instagram, sending it in a group chat, or just saving it for yourself. It’s designed to be visual and clean on both desktop and mobile, so it works anywhere you want to share it.
And for your individual trip maps, you can share those via a direct link - anyone can open it and explore your map without needing an account.
Approach 1: Build Your Travel Map Trip by Trip
This is the detailed approach, and it’s what I’d recommend if you want to create a rich record of your travels - not just where you went, but what you did there.
How it works
Each trip gets its own map. Here’s the process:
- Upload your travel photos - just select your images and upload them. Mapstra reads the GPS data embedded in each image and automatically creates markers on the map. No manual pinning needed.
- Add anything that’s missing - if some photos don’t have GPS data (older cameras, screenshots, downloaded images), you can add markers by hand by searching for the location.
- Save and name your map - give it a name like “Sardinia 2025” or “Japan Spring Trip” and you’re done.
From there, you can enrich your markers with extra details - a title, description, dates, a link to the restaurant or hotel, and custom icons. Each map can hold up to 25 photos.
Make it yours
Every map can be styled to match your taste. Choose from four map styles:
- Streets - the classic look with road details
- Outdoors - perfect for hiking and nature trips
- Light - clean and minimal
- Dark - sleek and modern
You also get a timeline view that displays your markers in chronological order with photo galleries, so you can relive the trip from start to finish.
How it feeds your profile
Every map you create automatically appears on your profile page. The stats update - trips taken goes up, new country flags get added, your percentage of the world explored grows. Your profile becomes a visual travel journal that builds itself over time.
This approach is ideal if you:
- Want a detailed record of each trip with notes, photos, and context
- Enjoy the process of organizing travel photos by location
- Like having a timeline view to relive each journey
- Plan to print your travel maps as posters later
Approach 2: One World Map, One Photo Per Location
Not everyone wants to build detailed trip maps. Maybe you’ve traveled a lot and going trip by trip feels like a massive project. Or maybe you just want the profile page - the map, the stats, the flags - without spending hours on it.
This approach is for you.
How it works
Instead of creating a separate map for each trip, you create one single world map and drop one photo per city or country you’ve visited.
- Upload one photo per place - pick your favorite image from each city or country. A street in Tokyo, a sunset in Santorini, a coffee shop in Lisbon. Mapstra pins them on the map automatically using GPS data.
- Add any places without GPS photos by hand - just search for the location and drop a photo on it.
- Save it - name it something like “My Travels” or “Places I’ve Been” and you’re done.
That’s it. You end up with a world map covered in pins, each one holding a single memory from a different place. And your profile page lights up with all the stats - countries visited, flags collected, percentage of the world explored.
Why this works
This method is fast. You can map 20 countries in under 15 minutes. You’re not writing descriptions or organizing galleries - you’re simply pinning your favorite photo from each place on the map.
It’s also focused on the outcome: the profile page. If what you really want is a beautiful page that shows where you’ve been in the world - one you can screenshot and post anywhere - this is the most direct path to get there.
This approach is ideal if you:
- Have traveled to many places and want to map them all quickly
- Care more about the big picture than individual trip details
- Want your profile page up and running today
- Prefer a minimal, one-photo-per-place aesthetic
Which Approach Should You Choose?
There’s no wrong answer here - and you don’t have to pick just one.
| Trip by Trip | World Map | |
|---|---|---|
| Time to set up | 10-20 min per trip | 15 min for everything |
| Detail level | Rich - photos, notes, dates, links | Minimal - one photo per place |
| Best for | Reliving specific trips | Seeing the big picture |
| Profile impact | Builds gradually over time | Instant visual impact |
You can absolutely mix both approaches. Create detailed maps for your favorite trips and use a world map for the rest. They all feed into the same profile page, so your stats and flag collection stay unified no matter how you build your maps.
Personally, I do a mix. My most meaningful trips get their own maps with full details and timelines. But for weekend getaways or places I visited briefly, I add them to a world map with a single photo. It keeps things manageable without leaving any country off the map.
What Makes Mapstra Different
I built Mapstra because I wanted something that didn’t exist - a travel photo map app that’s simple, visual, and doesn’t try to be a social network.
Here’s what sets it apart:
- Automatic GPS pinning - upload photos and they land on the map based on where they were taken. No manual tagging, no dragging pins around
- It’s free - creating maps, uploading photos, customizing, and sharing are all free. The only paid feature is the print download (starting at $2.99)
- Easy sharing - share your trip maps via a direct link (no account needed to view), and screenshot your profile page to show off your travel stats anywhere
- Four map styles - Streets, Outdoors, Light, and Dark, so your map matches your style
- Print your maps - export any trip map as a high-resolution poster with your photos arranged around it. Choose fonts, colors, paper size, and orientation
I didn’t want to build another app that gamifies travel or pressures you to post constantly. Mapstra is a quiet tool - you use it when you come back from a trip, or when you feel like looking back at where you’ve been. Your travel map profile is for you first, and for sharing second.
Start Building Your Travel Map Profile
Whether you go trip by trip or take the fast world map route, it takes just a couple of minutes to create your first map and see your profile come to life.
Try Mapstra for free - pick your approach, upload a few photos, and watch your travel story take shape on the map. Your stats, your flags, your world. All in one place.